
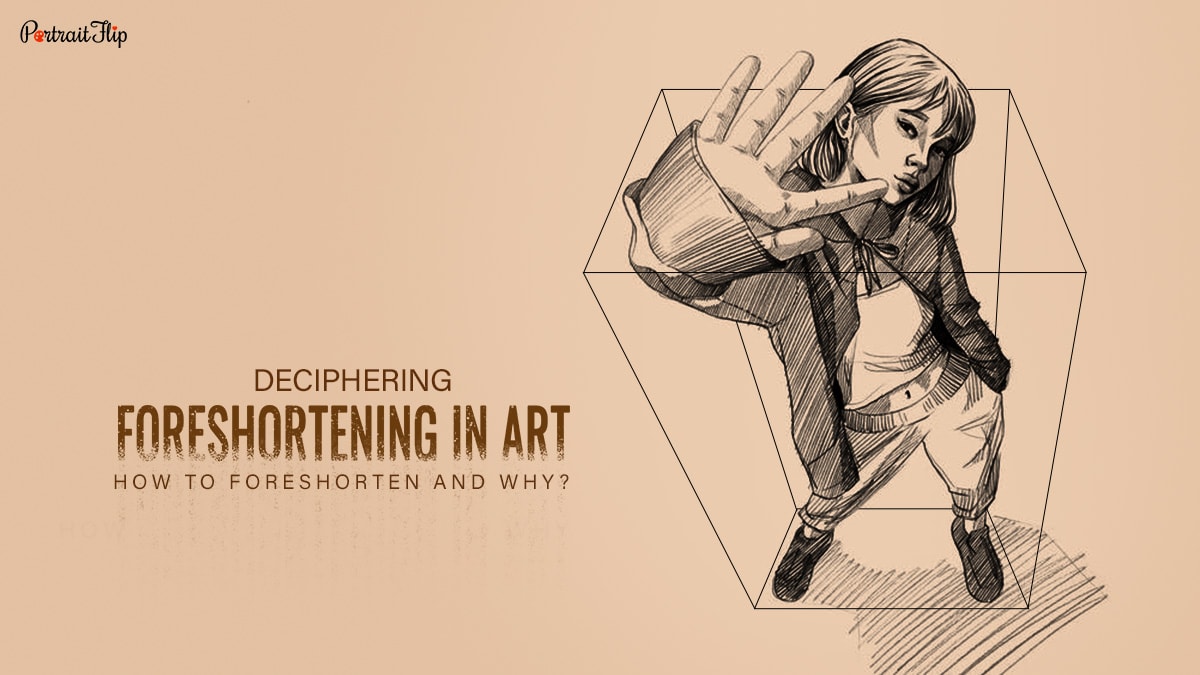
Deciphering Foreshortening in Art: How to Foreshorten and Why?
Oct
If you’re wondering what foreshortening is, then let me tell you that you’re not alone.
Being an art lover, this question keeps running through our minds.
But let me ask you something.
Do you sometimes feel as if you’re standing into the painting or in front of the subject? As if you belong to the art?
It’s because of foreshortening.
Foreshortening is a old-unknown term that was used to capture accurately painted images.
An artist uses this technique to create an illusion so that its viewers can view objects at a certain distance and feel their presence in the art.

The method was difficult to master, but that’s what I am here for.
To give my readers a simple understanding of foreshortening, I dig a little deeper.
So without further ado, let me show you the entire process involved in foreshortening and the steps that will help you master this technique.
Table of contents
Explaining Foreshortening (In-Depth)
At a basic level, foreshortening is a technique used by artists to portray an object or human figure from a distance.
It involves renderings in art that bring depth to any type of object.
But there is one query: Where exactly did foreshortening come from?
Let’s go back in time to uncover its real definition.
History of Foreshortening
There isn’t any specific backstory related to this technique.
I can say that an artist implemented this technique in one of his works of art, which resulted in the discovery of foreshortening.
Andrea Mantegna pioneered foreshortened art.
You can witness this in his painting, “Lamentation of Christ (c. 1470–4).”
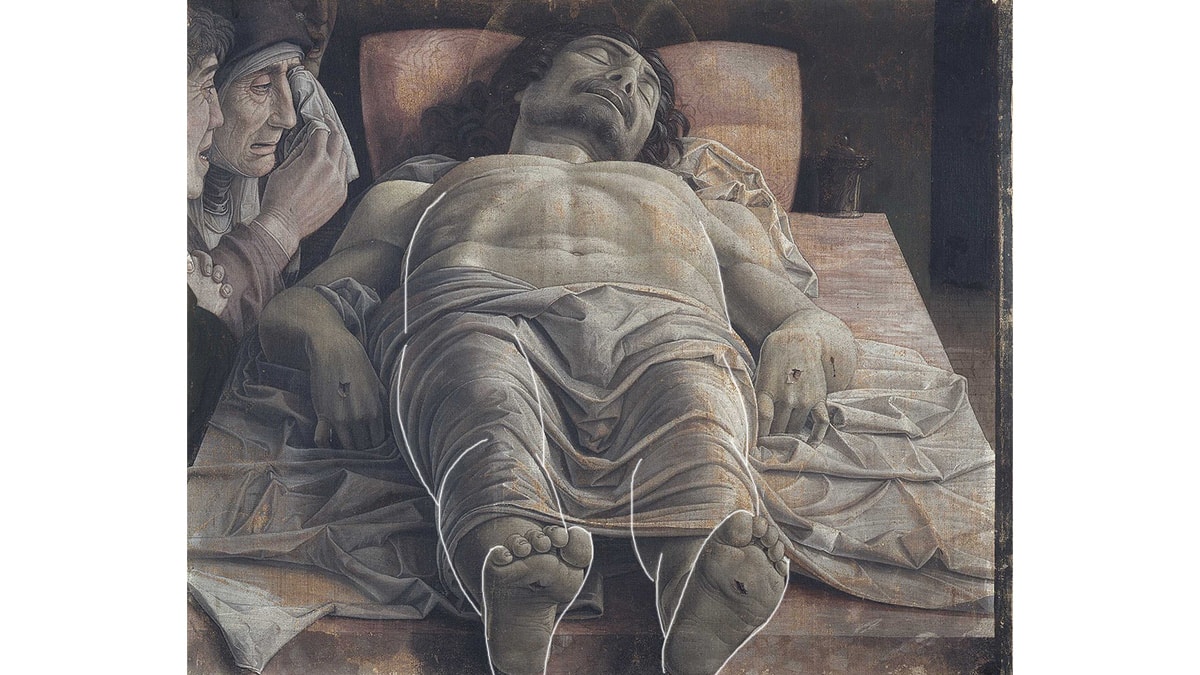
The chest and legs of Christ are shortened, which makes the viewers feel as if they are sitting in front of his feet.
It created a sense of depth in the art, along with space.
Not just Mantegna but Vincenzo Foppa and Paolo Uccello were also on the list of foreshortening pioneers.
Foreshortening gained popularity during the early Renaissance period.
During the Renaissance era, Michelangelo became the master of foreshortening.
“The Separation of Light from Darkness” is one of the brilliant works that depicts foreshortening.
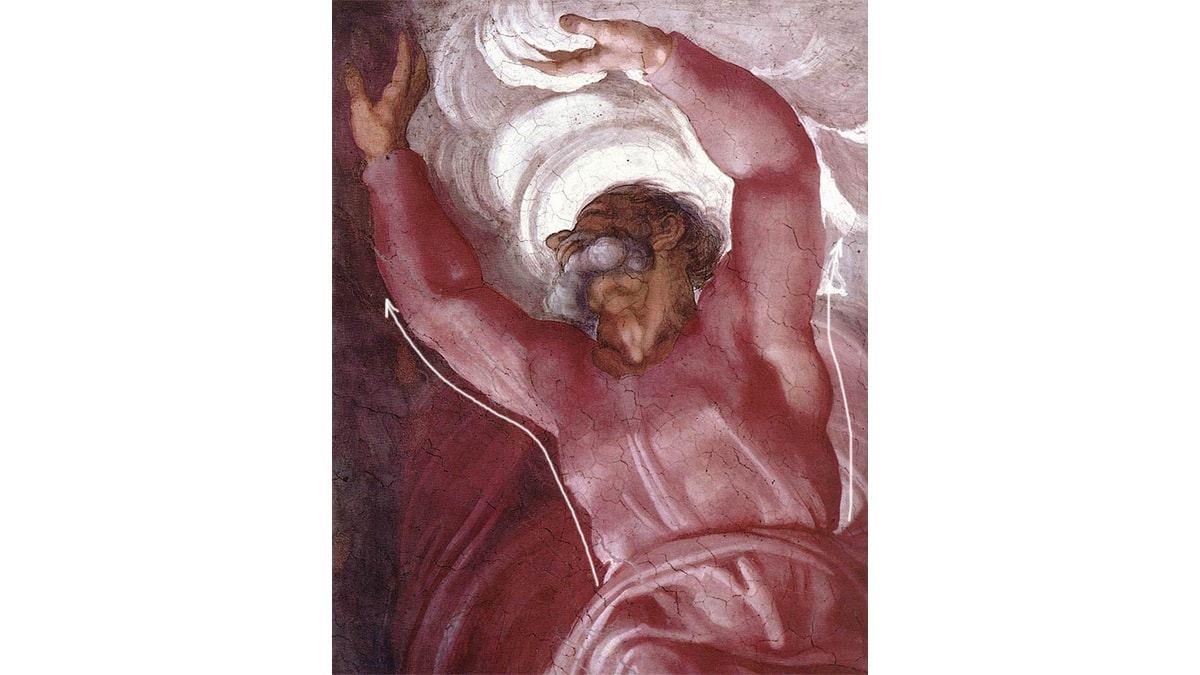
It shortens the body of God and makes him appear in a rising position for the audience.
If you look at paintings by Michelangelo, the illusion he creates in his art somewhere portrays a foreshortened perspective.
The Renaissance didn’t only push Michelangelo to portray foreshortening artwork but also dragged many artists who ended up creating amazing pieces of work with this technique.
Correggio, a renowned painter, was not left behind in using this technique.
He used foreshortening to design a dramatic appearance in his art.
“Assumption of the Virgin (1526–30)” is one of the most celebrated works that depicts foreshortening art.

This masterpiece influenced many painters to catch the essence of foreshortening in their work.
Paolo Veronese was another great artist to show foreshortening in art.
Marciana Library and Doge’s Palace are the places where you can witness Veronese paintings on ceilings.
If I keep adding the names of the artists who experimented with the foreshortening technique, then I guess I have to get a continue sign at the end.
A technique that made various artists take a new turn in their skills.
Let’s continue with other topics that will enhance the meaning of foreshortening.
Also Read: Form in Art
How Can We Visualize Foreshortening
I brought a mini excercise for you.
- Lift your arm and place it in front of your body. Now slightly bend your elbow by bringing your forearm parallel to your chest.
- What you witness in front of you is limited foreshortening.
- Now extend the whole arm in a straight position. You’ll notice that your fingers and palm appear to be much shorter.
- The actual length of your forearm is the same but the perspective you’re witnessing now is extreme foreshortening.
Now you know what exactly the definition of foreshortening in art is.
Art that is created in a three-dimensional space needs to incorporate foreshortening in some way.
Foreshortening is the method used to show hyperrealism in art.
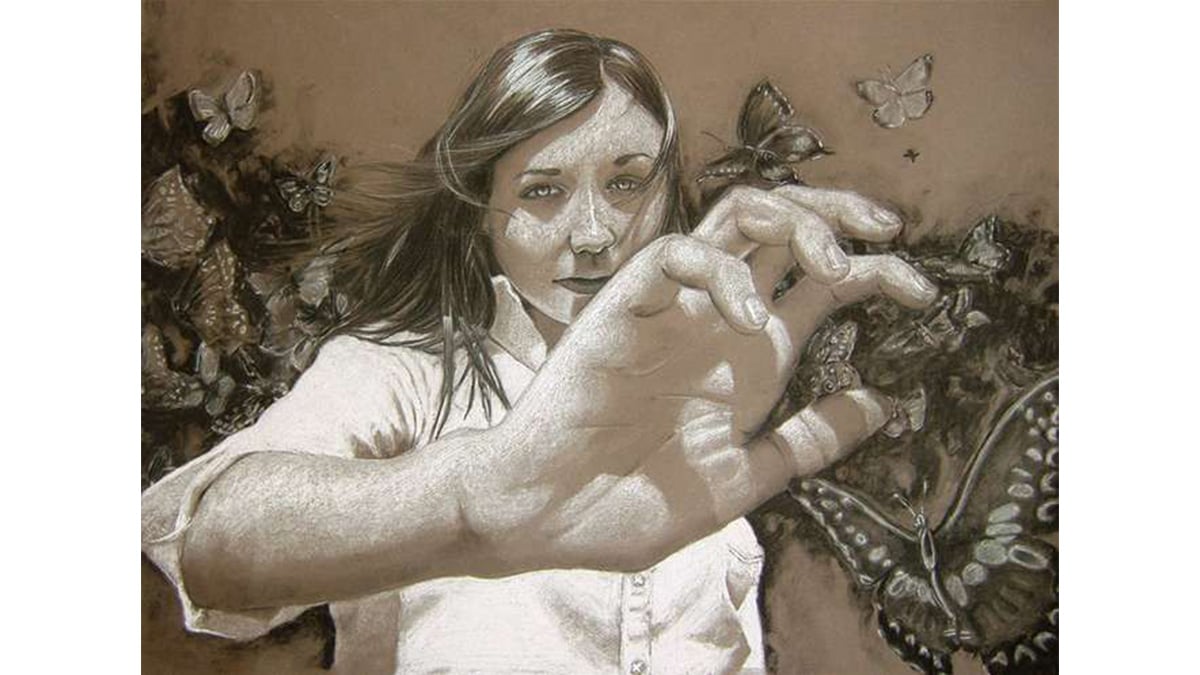
You can use foreshortening drawings to bring extra emphasis to the part that you want to highlight.
For example, if you want to paint a person lying on the bed with their feet facing the audience, then you need to foreshorten the feet a bit bigger than the body.
This will help the viewer have a better perspective on the figure.
The Effects of Foreshortening
Why do artists incorporate foreshortening in their paintings? What are the effects of foreshortening techniques?
Well, the answers contribute a few points:
- Subjects in the distance appear shorter than they actually are.
- It emphasizes the subject to which the artist wants his viewer to pay attention.
- One part of the subject appears to shrink in size in the background, keeping the other part bigger.
There are mathematical approaches to showing foreshortened drawings in a certain manner.
As an artist, the only goal you can have is to create art that appears correct to the audience’s eye.
It doesn’t concern the mathematical part.
Study The 7 Processes of Foreshortening
Depending on the subject the artist wants to depict in their art and the idea they have in mind.
To get a better foreshortening perspective, we need to acknowledge the process.
This will help you grasp the technique faster and make the whole process a bit easier.
First Tip to Foreshortened
Where do you want to draw the subject? – What I mean by this is the perspective you have in mind to portray in front of the viewers.
Which part do you want to show closer and which is the furthest? Keeping this in mind, you shall initiate your foreshortening pose.
Second Tip to Foreshortened
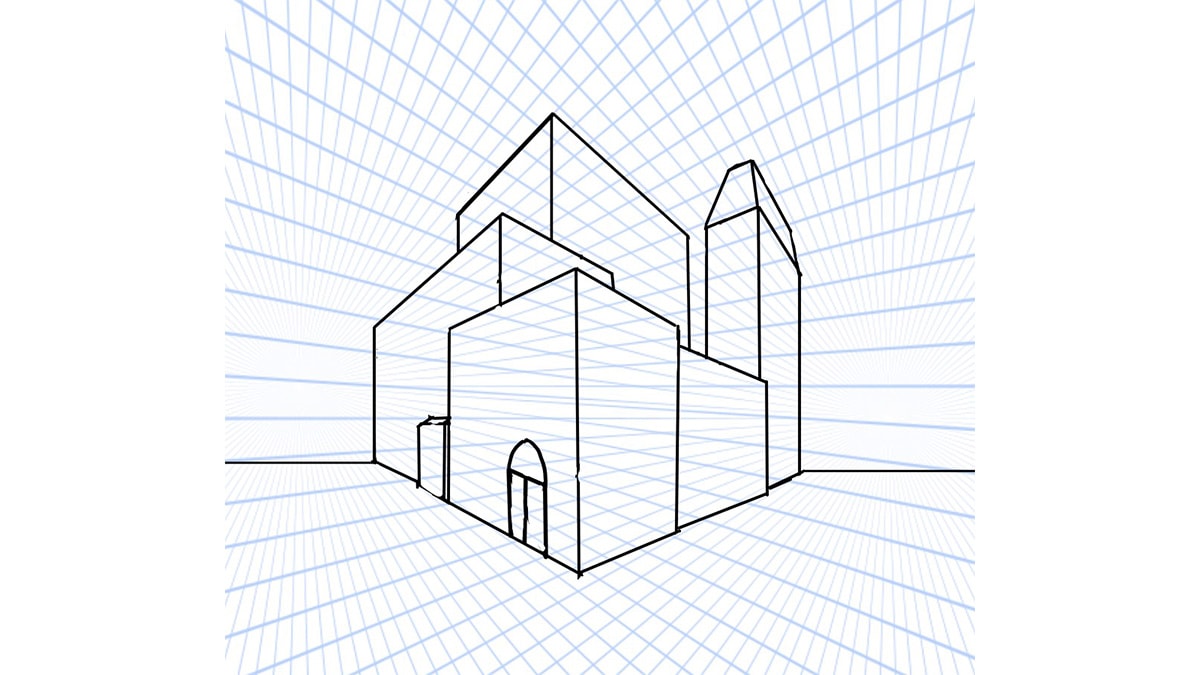
Use perspective lines – This is one amazing way to brush your work in the most accurate manner.
By using perspective lines, the foreshortening becomes easy.
The extended lines help you determine the size of the subject along with its surroundings.
Just lift your pencil and sketch by including these horizontal lines, which will definitely make your task easier.
Third Tip to Foreshortened
Consider the overlapping of foundational shapes – When you break something into pieces, it’s easier to examine the parts of the entire composition.
Each proportion in art is significant and holds the whole subject together.
This is the third tip, which means whenever you paint, try to break down the subject into small parts.
You know where each part belongs; keep figures in perspective and overlap the objects accordingly.
Through this process, your task will be easier and you will be able to map out the overlapping parts.
Fourth Tip to Foreshortened
Sketch the subject as if you could see through it – Don’t get confused when I say see through it.
What I mean by that is you should draw the object as if you’re present in that particular space in art.
This process allows you to follow a pattern throughout and helps you understand the subject as a whole.
Fifth Tip to Foreshortened
Some extra attention to your edges – To create an emphasis in the art, you need to pay attention to the edges and contours.
The foreshortened definition depends on how the subject edges are created.
You need to be careful when adding extra highlights to the area where you want to create an illusion for the audience.
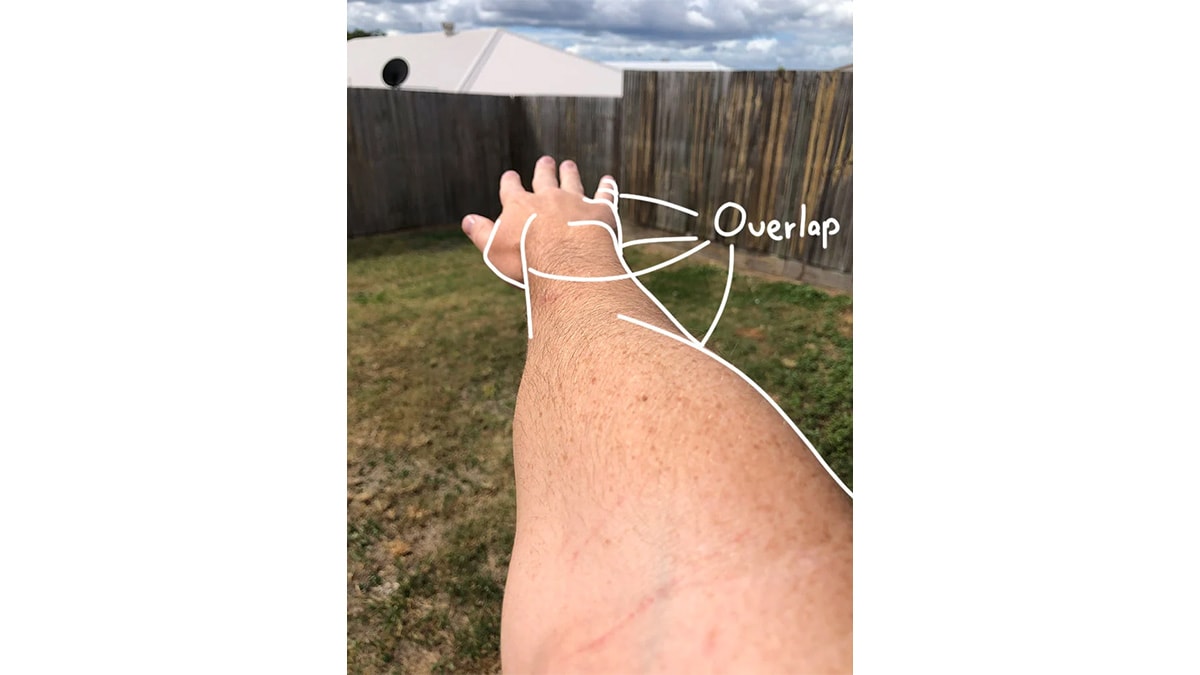
Sixth Tip to Foreshortened
Consistency – A continuity is necessary to have form in art.

For example, if you are drawing an extended arm, overlapping may occur from your wrist to your thumb.
Due to overlapping, the consistency may break.
To avoid such things, pick a long line and keep your focus on that particular line, which may help in maintaining your consistency.
Seventh Tip of Foreshortened
Look for your personal preference – Understating the effects of your foreshortening can make your artwork appear flatter and almost cartoonish.
Alternatively, you can enhance the composition by exaggerating your foreshortening effects.
Suggested: Impact of Contrast in Art
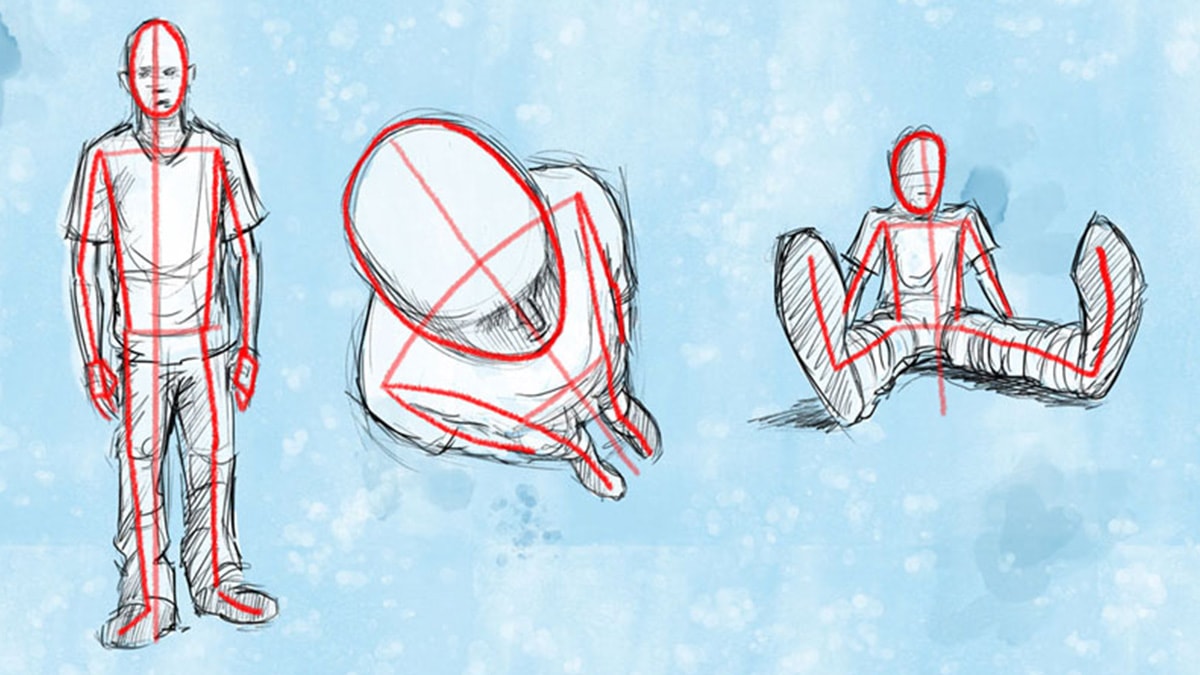
How to Foreshorten Figures: 4 Step Rule
What is the most complicated form to capture? It’s us, the humans!
Drawing a human figure is difficult and may require extraordinary skills.
Foreshortening techniques can make this task easier.
It is essential for drawing a realistic and proportional figure in space.
Step 1: Measure Your Subject
Before you start drawing any subjects, you need to know the right measurements.
Build a perspective on how you want your viewers to look at your subject and work accordingly.
Draw a line that will help you represent your figure’s height.
The line can be drawn in any direction, depending on your subject. It gives a viewpoint.
It will also assist you with the rest of your proportion and help you plan the rest of the outcome.
Step 2: Map Out Other Parts
In the second step on how to foreshorten a figure, you need to focus on other proportions as well.
For example, waist, shoulder, neck, and so on.
Create lines that will help you obtain accuracy on the figure’s length and position.
Step 3: Stick Figure Method
You read it right. The stick figure method is when you create lines on the basis of which your figures take shapes.
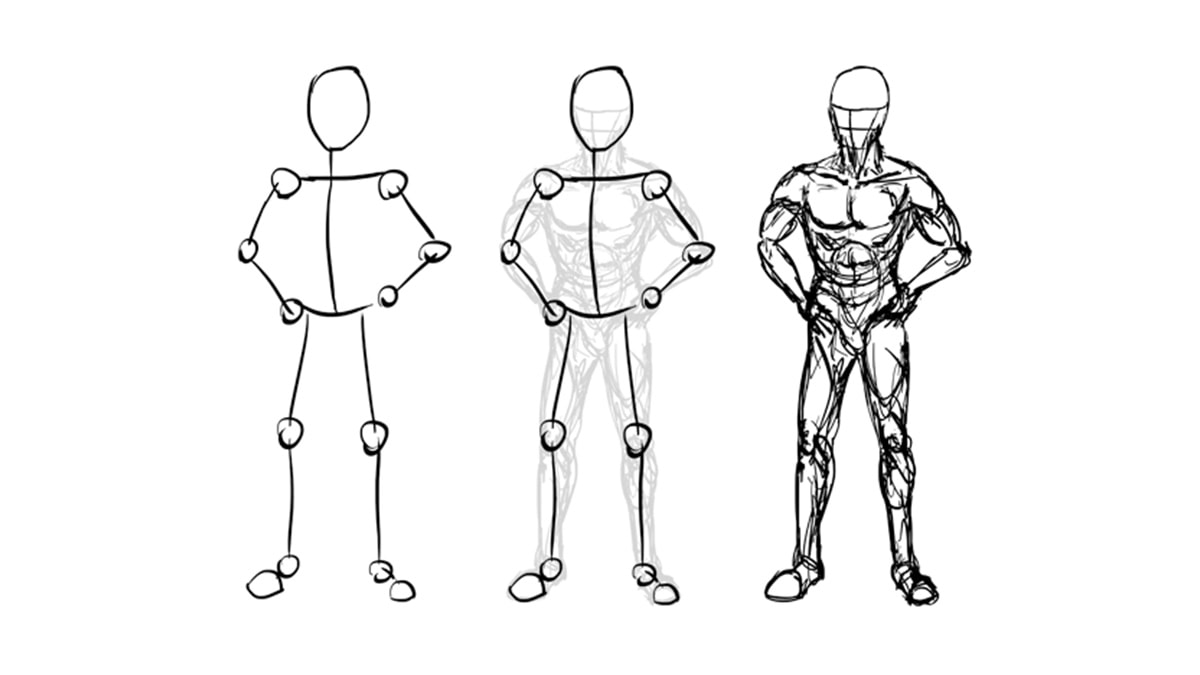
You need to approach this step as if you are producing the bone structure of a human body.
You can also use geometric shapes, which will provide a better understanding and a perfect result.
Step 4: Buildup a Figure
At this stage, you need to flesh out the figures.
This step helps you map out the figure according to your viewpoint and add extra details.
Whether it is foreshortening hands, foreshortening arms, or foreshortened legs.
This is your time to exaggerate the level of figure perspective until you reach your final piece.
To be precise, let me enlighten you with two techniques that define foreshortening.
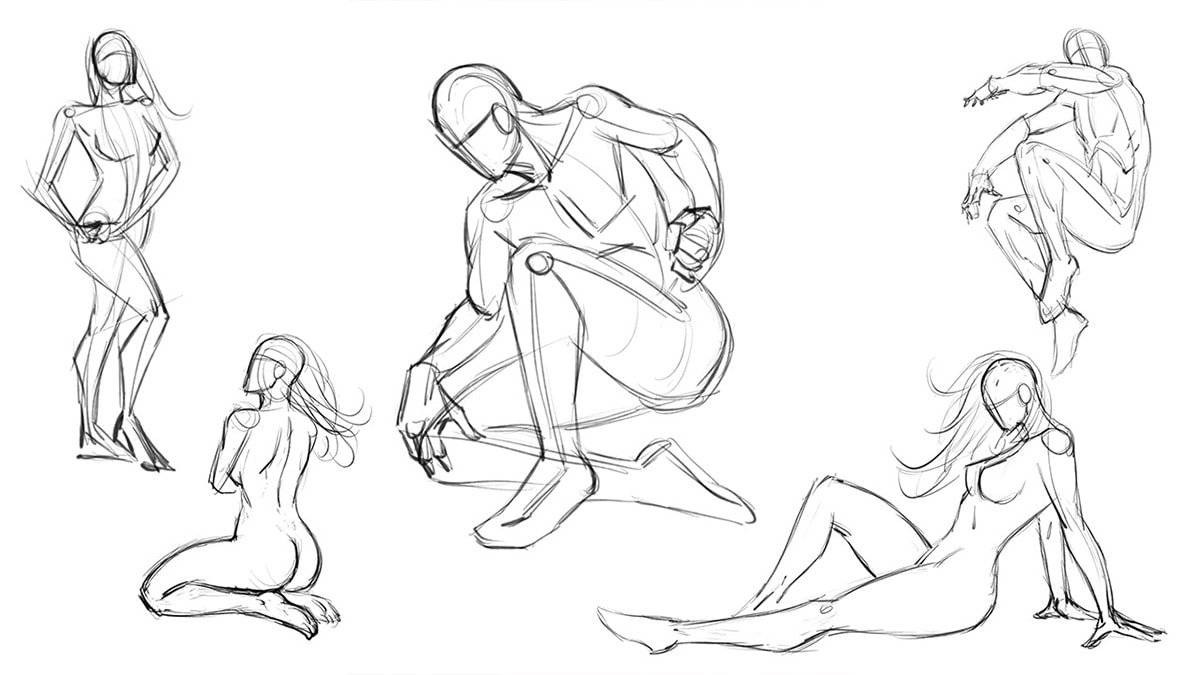
The Geometric & Spiral Technique

There are two types of techniques: geometric and spiral.
To create an emphasis in art at a certain focal point, you need to understand these two basic methods.
The geometric method is the same process that we read in the above-mentioned steps.
There are no such rules to follow for this technique.

You just have to be careful while drawing or mapping out your figures, keeping their visuals in mind.
Try to visualize the limbs of the human body in a three-dimensional format.
Each shape in art depends on another.
You need to figure out how to make them fall together.
If we talk about the spiral or coil method, then it is a slightly different and messier technique than geometric.
However, it works very well when it comes to foreshortening pictures in three dimensional view.
Writer’s tip: Use your pencil a bit lighter.
Whenever you try this technique, keep your pencil tip lighter so that it is convenient for you to rub out the extra detail.
One thing that you need to consider when using the spiral technique is that whether your coil is flat or not.
To form a figure, you need to move the spiral in a certain direction.
For example, a leg extending in your direction needs to coil the circle in a compact format.
This way, you will be able to create a figure that you have in mind.
Even landscape paintings are foreshortened. Want to know how? Keep reading!
Guide to Foreshortening Landscapes
The function of art varies according to the artist’s perspective.
Most landscape artwork that you witnessed today has a certain amount of foreshortening in it.
The most common example of a foreshortened landscape is “A Quiet Monastery (1890) by Isaac Levitan.”
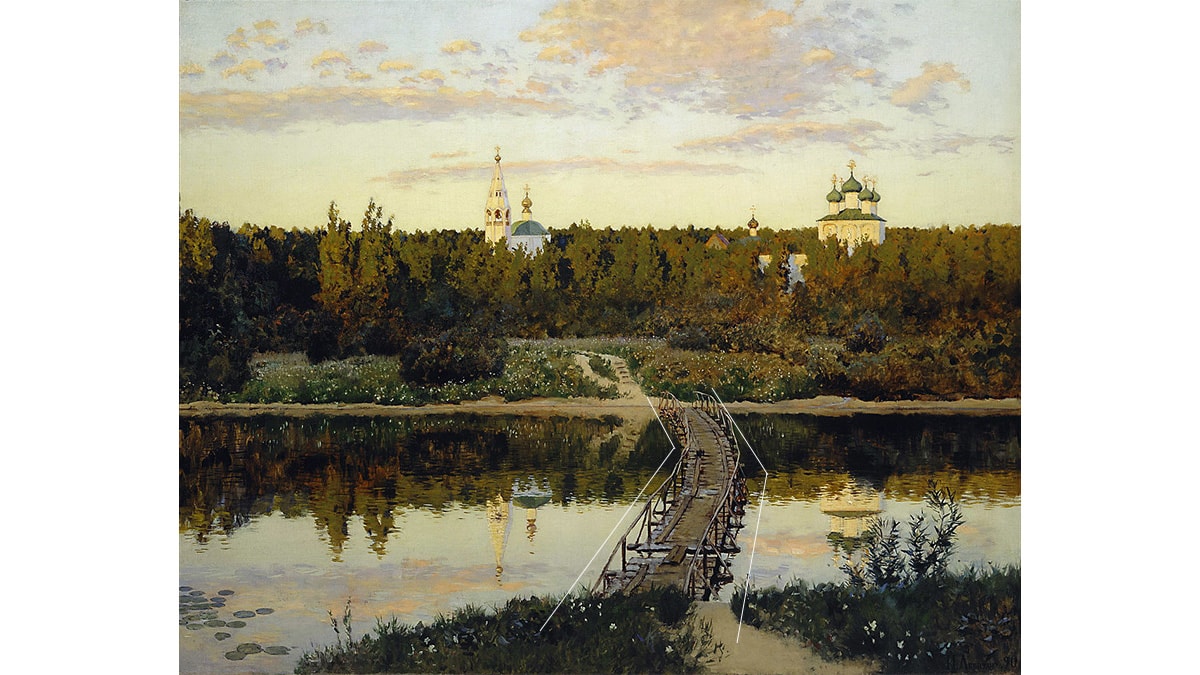
Just observe this beautiful landscape.
The composition of the painting is foreshortened:
- The small bridge appears closer as compared to the monastery, which is situated in the background.
- The trees are either extending towards or away from the viewer.
- The reflection of the scenery in the water.
There are realism artworks that reflect foreshortening for example, “Christina’s World by Andrew Wyeth.”
Although foreshortening seems less complex in landscapes, that doesn’t mean it’s absent.
Each landscape artist creates effortless paintings.
Due to this, the audience doesn’t feel foreshortened at first glance, as it portrays actuality.
Foreshortening in landscapes involves one-point perspective.
There is another way to create a foreshortening landscape painting.
Own one! Incorporate this method just by clicking on the below link and watch how we create foreshortened art for you.
The Conclusion: Key Factors of Foreshortening
Most people are not aware of the term foreshortening, and even if they are, the meaning is unclear in their minds.
I’ll end this blog with a small summary about drawing humans in perspective.
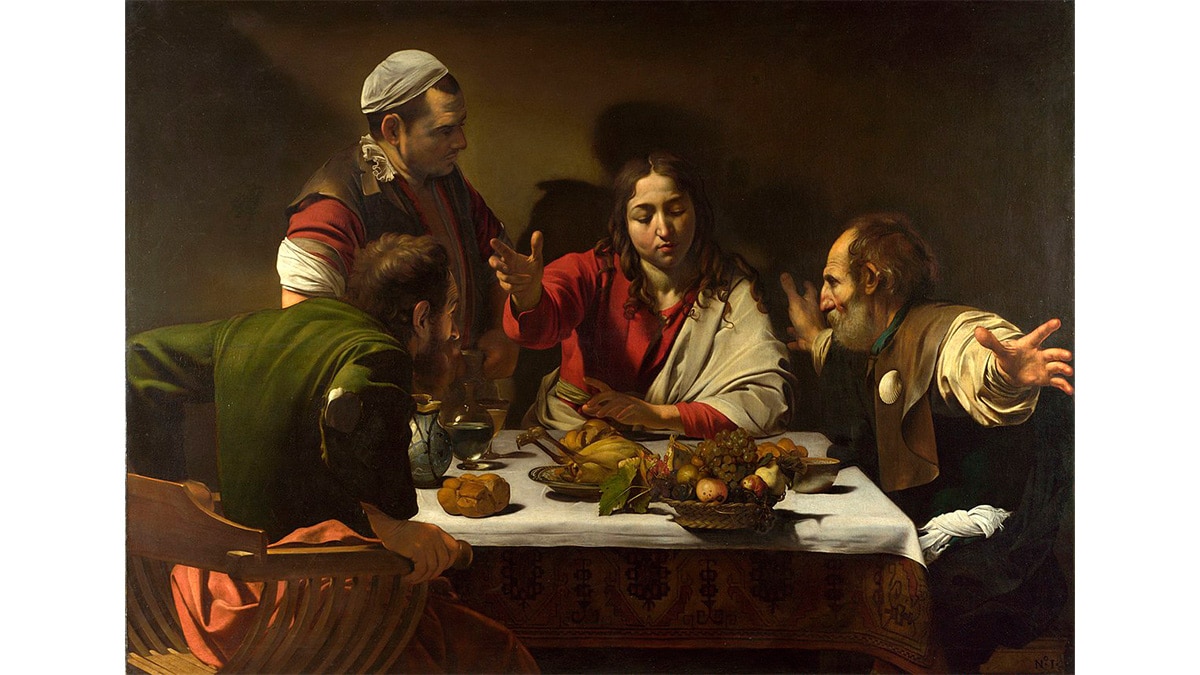
But first, I have a test for you.
Can you identify where foreshortening is used in the above art?
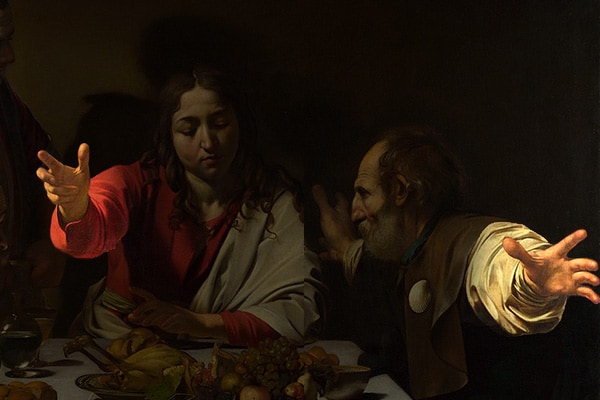
The extended hands reflect the foreshortening technique.
This is one of the paintings by Caravaggio, “The Supper at Emmaus (1601),” which shows the technique in the most flawless way.
The method makes the object shrink as it moves in distance and emphasize as it comes closer to the eyes.
Now I can say that you have understood the foreshortening definition in art.
Suggested Read: Ship a Painting
Hello Readers
How was the blog about the foreshortening technique in art for you?
Did you enjoy the read?
Enlighten me with your perspective about this blog and the topic via comments.
A different thought is always what I look forward to.
You can even read our art principles and elements page, which is filled with different categories of art.
Keep reading until I come back with my next writing.
See ya!
FAQs
Foreshortening is a method where the object is shortened in size by drawing it away from the viewer or by depicting it on a larger scale, which shows the object closer to the audience.
It was used by artists in the 16th century, mainly Renaissance artists, in order to make the art appear natural.
Francesco Squarcione created foreshortened art.